TL;DR — What You'll Set Up
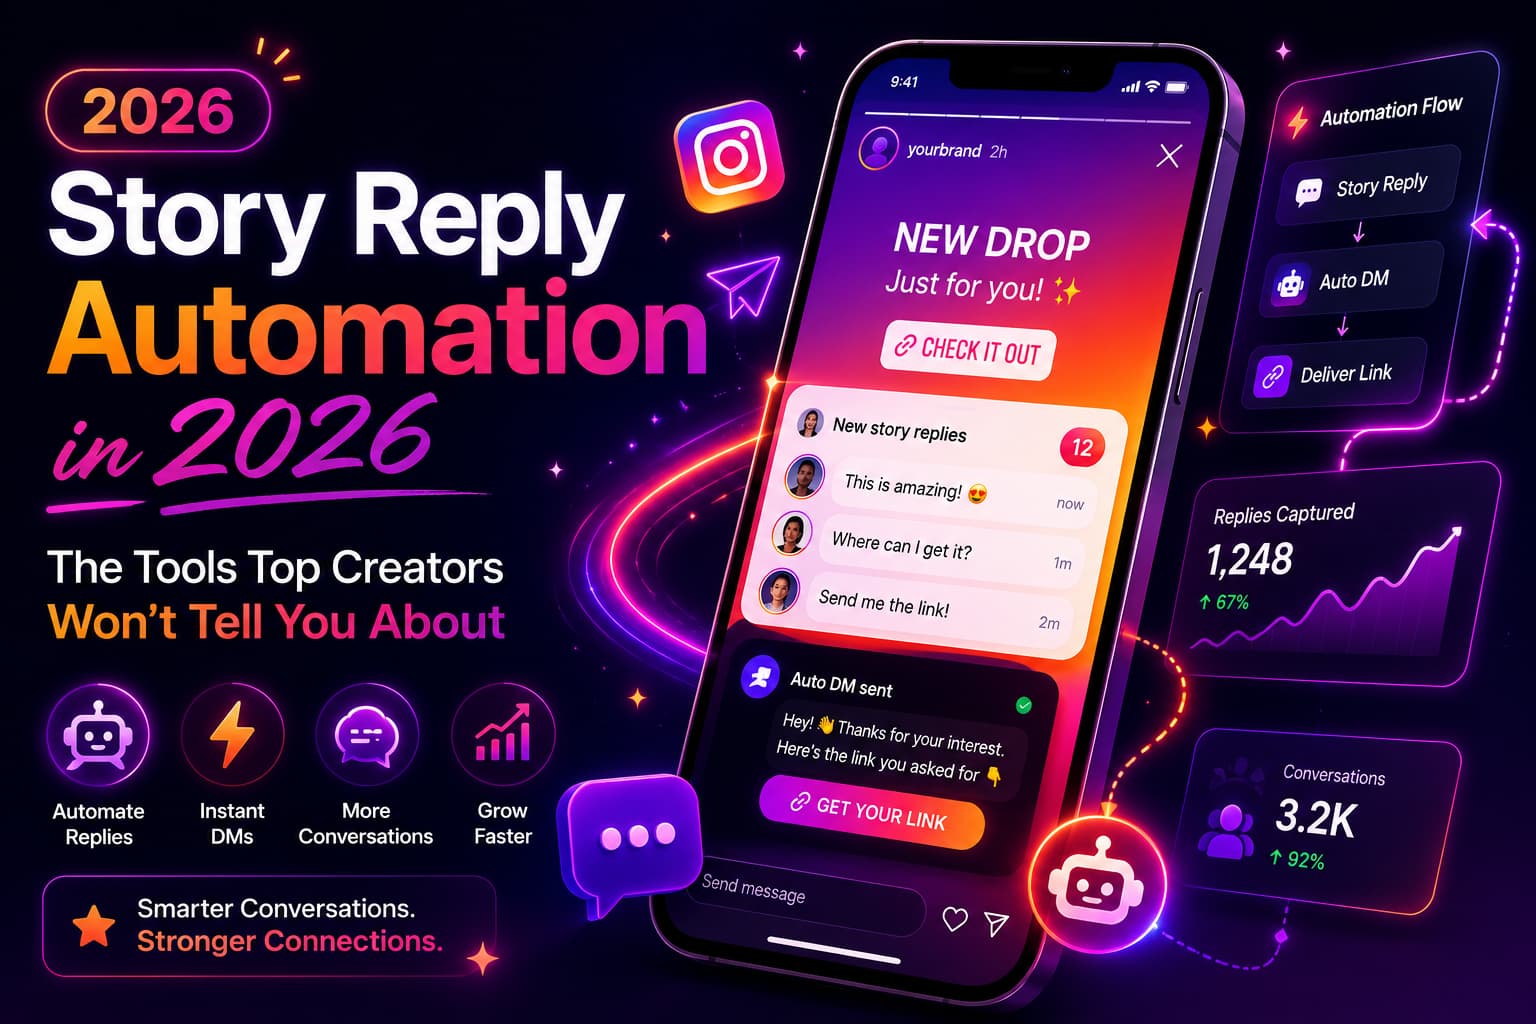
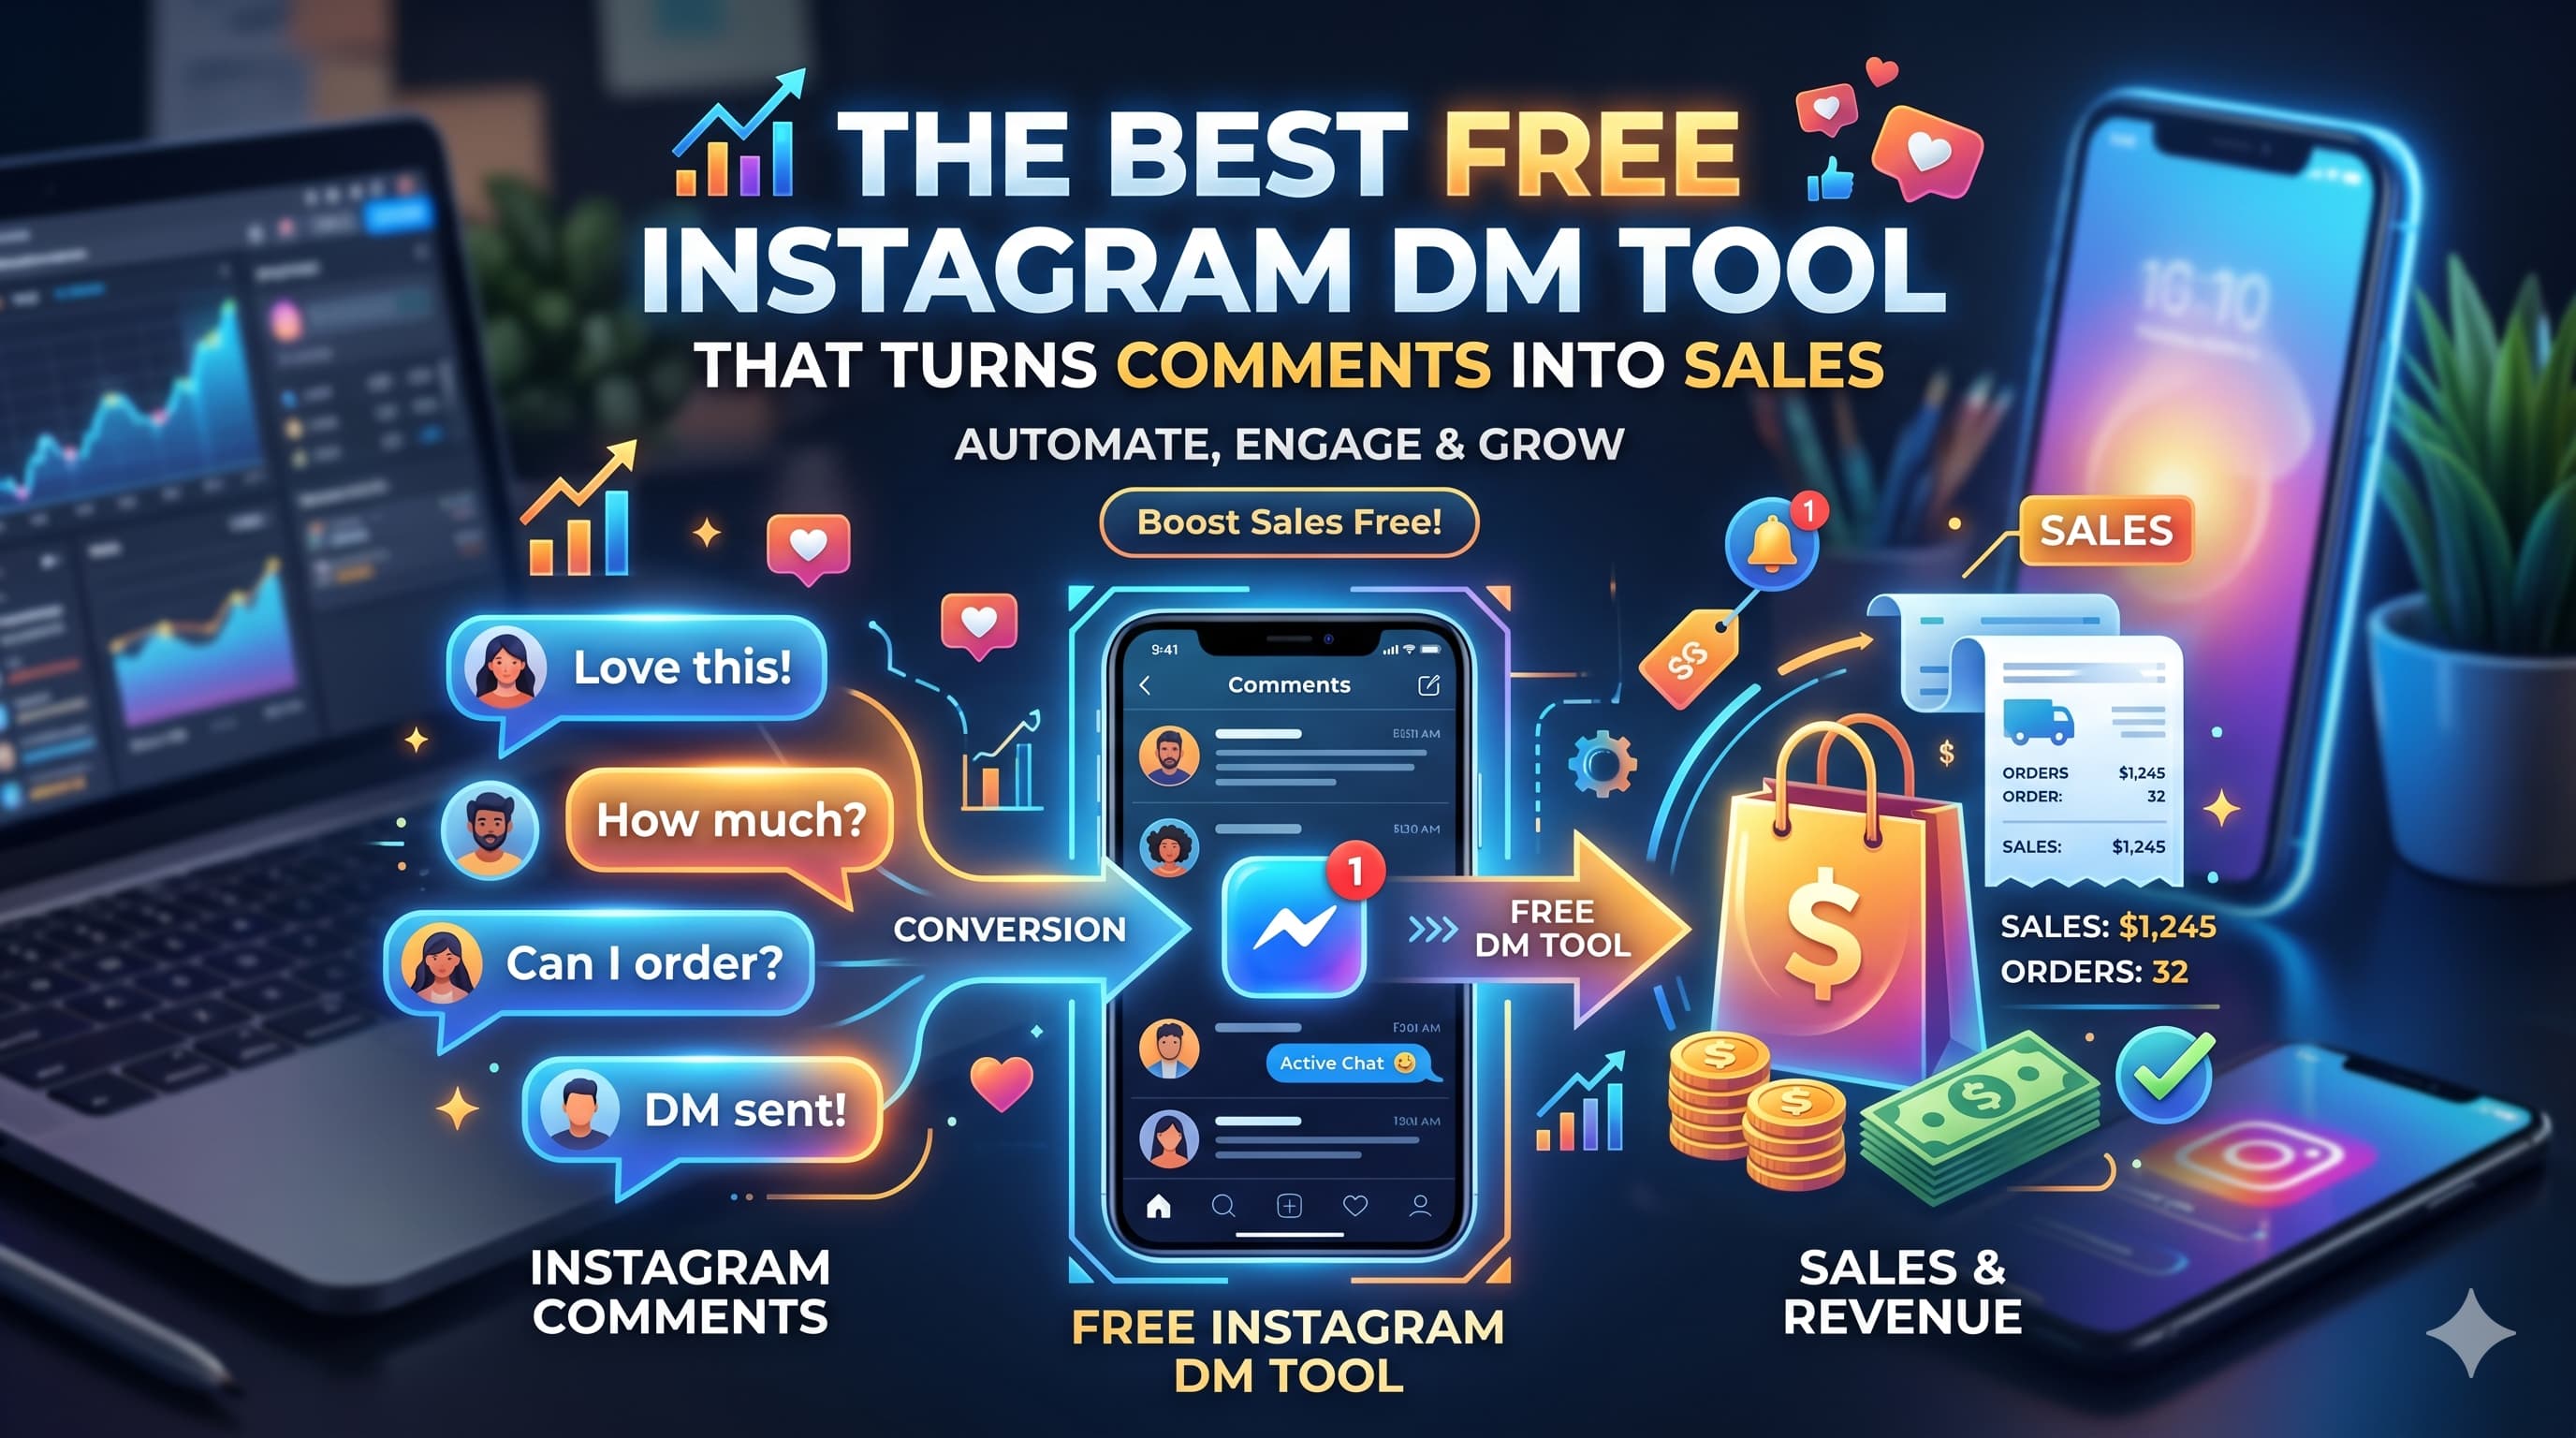
- A live Instagram automation that sends a DM to anyone who comments a specific keyword on your post or Reel.
- Total setup time: under 10 minutes.
- Tool used in this guide: InstantDM ($9.99/month flat, free plan available, Meta-verified). The steps are functionally identical on ManyChat, Inrō, LinkDM, and most other comment-to-DM tools.
- What you need before you start: a Business or Creator Instagram account, linked to a Facebook Page where you have admin access.
- If you want the full overview — what comment-to-DM is, why it works, the 6 best tools — read the complete 2026 guide first.
Prerequisites: Three Things You Need Before You Start
Comment-to-DM automation runs on Meta's official Instagram Graph API, which has hard requirements that cannot be skipped. If any of these are missing, the connection will fail at Step 1.
- Business or Creator Instagram account. Personal accounts cannot connect to any Graph API tool. Switch by opening Instagram → menu → Settings → Account → "Switch to Professional Account" → Business or Creator. Free, takes 2 minutes.
- Facebook Page linked to your Instagram. Meta's API authorisation flows through Facebook. If you do not have a Facebook Page, create one (free) and connect it to your Instagram from inside the Instagram settings.
- Admin access to that Facebook Page. You must be the page admin (not just an editor or moderator) for Meta to grant the comment automation permissions.
Once these three are in place, the rest of the setup runs cleanly. If you skip them, you will hit an "Account not eligible" error at Step 1 and need to come back and fix it.
The Complete 8-Step Setup Walkthrough
Step 1: Create Your InstantDM Account and Connect Your Instagram
Go to InstantDM.com and sign up for a free account. No credit card is required at this stage.
Once inside the dashboard, click "Connect Instagram Account" in the top navigation. You will be redirected to a standard Meta login screen — the same OAuth flow you see when any app requests Facebook or Instagram permissions. Log in with the Facebook account that is the admin of your linked Facebook Page.
Meta will show you a list of permissions the tool needs — typically: read comments on your posts, send messages on your behalf, and read basic profile information. Approve all of them. The automation requires these permissions to operate. This is not a rogue tool hacking your account in the background — it is you explicitly granting permission through Meta's standard, secure permission system.
Once you approve, you will be redirected back to the InstantDM dashboard. You should see your Instagram profile photo and handle displayed, which confirms the connection was successful.
Common issue at this step: An "Account not eligible" error usually means your Instagram is still on Personal. Switch to Business (see Prerequisites above), then re-run the Connect flow.
Step 2: Navigate to the Comment Automation Section
In the left-hand sidebar of the dashboard, look for "Automations" or "Comment to DM" — the exact label varies slightly by tool version. Click it.
This opens your automation management panel. If this is your first time, the list will be empty. Click "Create New Automation" or the plus icon to start building your first trigger.
Step 3: Choose Your Target Post or Set a Universal Trigger
You will be asked to choose where this automation should run. You have two options:
Specific Post Trigger: Choose one post or Reel from your feed. The automation only fires when someone comments on that specific piece of content. Best for campaigns tied to a single Reel or product launch because it keeps your data clean and your reporting accurate.
Universal Trigger: The automation applies to every post on your account, past and future. Best for evergreen content where the same keyword always delivers the same resource — for example, anyone who comments "FREEBIE" on any of your posts ever gets your lead magnet.
For your first automation, choose Specific Post and pick a Reel you are currently promoting. Once you understand how the system behaves, you can expand to a universal trigger.
Step 4: Define Your Keyword Trigger
This is the word or phrase that activates the automation. Type it into the "Keyword" field.
Choosing the right keyword matters more than most people realise. Here are the principles that work:
- Keep it short and unambiguous. Single words outperform phrases. "GUIDE" beats "send me the guide please." People type quickly in comments and will not always spell out a long phrase correctly.
- Make it specific to your CTA. If your Reel says "Comment the word BLUEPRINT," use BLUEPRINT. The keyword must match what you say in the video exactly, or you confuse your audience.
- Avoid common conversational words. Using "great" or "love" or "wow" as your trigger fires the automation on general compliments, which feels spammy to people who did not ask for anything.
- Capitalisation settings: Most tools let you choose case sensitivity. Set to case-insensitive so "guide", "Guide", and "GUIDE" all trigger the same automation. Recommended.
- Multiple keywords for one DM: You can usually add several keyword variations that lead to the same message. "LINK", "SEND", and "INFO" can all trigger the same DM about your product. This catches people who do not follow the exact CTA but clearly have the same intent.
Step 5: Write Your Automated DM
The message your audience receives is the most important creative element in this entire system. It is your first private touchpoint with a warm lead. Write it accordingly.
Structure that converts:
Open with acknowledgment: "Hey! Thanks for commenting on my post." Makes it feel personal even though it is automated.
Deliver the value immediately: "Here is the free guide I mentioned: [link]." Do not make them click through two more steps to get what they asked for.
Add a soft CTA: "Let me know if you have any questions — I read every reply." Opens the door to a real conversation without being pushy.
Length guidance: Keep your first DM under 200 characters if possible. In 2026, DMs that arrive looking like a newsletter get ignored. DMs that arrive looking like a text from a friend get opened. The link is the value — the text around it should be minimal.
Example DM that converts well:
Hey! Here's the client acquisition blueprint you asked for: [link]. Let me know if you have any Qs.
That is 90 characters. Friendly, immediate, actionable. Compare that to a 400-word DM that reads like a sales email — the short version wins on open rates and click-throughs every time.
Step 6: Enable the Public Comment Auto-Reply (Do Not Skip This)
Most creators skip this step, and it is a huge mistake.
In addition to the DM, most tools let you automatically post a public reply to the user's comment. Enable this. Set it to something short and friendly: "Sent it to your DMs! 📥 Check them now." or "On its way to your inbox ✅"
This matters for three reasons:
- It confirms the system worked. Tells the commenter where to look. Cuts the "did it send?" follow-up confusion.
- It boosts your public comment count. More comments → better algorithm signal → wider distribution.
- It functions as social proof. Other readers see 30 "Sent to your DMs!" replies stacked under your post and know exactly what to do to get the same.
If your tool supports it, configure 3 to 5 randomised public reply variants so the thread does not look identical 50 times in a row. ("Sent! 📥", "Just hit your inbox ✅", "Check your DMs!", etc.)
Step 7: Configure Timing and Availability Settings
Choose whether your automation runs 24/7 or during specific hours.
For comment-to-DM specifically, 24/7 is almost always the right choice. The entire point is to respond instantly regardless of when the comment arrives. If you restrict to business hours, you leave leads unanswered during evenings and weekends — which is often when consumer engagement is highest.
Limited hours only make sense if the DM requires a personal follow-up that your team handles manually. In that case, run the automation only during the hours when someone is available to continue the conversation.
Step 8: Test It Before Going Live
This step is not optional. Test the automation yourself before you publish your CTA to your audience.
Create a secondary Instagram account (or have a friend or team member do it) and comment your keyword on the target post. Watch for two things:
- The public auto-reply appearing under your test comment.
- The DM landing in the test account's inbox.
Time it. Both should happen within 5 to 10 seconds. Open the DM. Is the link working? Does the message read naturally? Anything missing?
Only after a successful test should you go live with your CTA to your audience.
Total setup time: under 10 minutes. Once live, it runs 24/7 with zero manual effort.
Common Issues and How to Fix Them
Here are the four issues that account for almost every failed setup:
- "Account not eligible" at Instagram connect: Your account is still on Personal. Switch to Business or Creator in Instagram settings, then reconnect.
- OAuth succeeded but no posts appear in the picker: Your Instagram is not properly linked to a Facebook Page, or you are not the page admin. Re-check the link inside Instagram settings → Account → Linked Accounts.
- Test comment fires no DM: Trigger is case-sensitive but you commented in different case; automation is paused; the wrong post is selected; or Meta permissions are missing "Send messages." Fix in that order.
- DM sends but public reply does not: The "Public auto-reply" toggle is off. Re-open the automation, enable it, save. Past comments do not get retroactive replies — only future ones.
What to Do After Your First Automation Is Live
Setup is the easy part. The leverage comes from running multiple high-ROI campaigns in parallel. The most common patterns are:
- Lead magnet delivery — comment "GUIDE" → DM with PDF link
- Giveaway entries — comment "WIN" → DM confirming entry
- Product launches — comment "EARLY" → DM with waitlist link
- Customer support routing — comment "SHIPPING" → DM with shipping policy
- Direct sales — comment "BUY" → DM with product page link
- Content drops — comment "NEW" → DM with Spotify/YouTube link
For the full breakdown of each campaign type with example CTAs and conversion benchmarks, plus the side-by-side comparison of every major tool, read the Instagram Comment-to-DM Automation: Complete 2026 Guide.
Conclusion: You Are Now Running 24/7
The setup you just completed runs in the background forever. Every comment that mentions your keyword — at 3 AM, on a holiday, while you are on a flight — triggers an instant DM. No manual effort, no missed leads, no late replies.
The single biggest mistake creators make after this point is leaving the system at a single automation when they could be running five. Once you have proven the mechanic works on one post, scale horizontally — different keywords for different audiences, different campaigns for different content pillars, different DMs for different intents.
If you have not signed up yet, InstantDM's free plan covers everything in this guide with no credit card required. You can have your first automation live in under 10 minutes from now.
Related Guides
- Instagram Comment-to-DM Automation: The Complete 2026 Guide — what it is, why it works, the 6 best tools compared.
- Best Insta DM App & Instagram DM Automation Tools (2026)
- Mastering IG DM Funnels: Guide to Auto DM Sales
- Connect Facebook to Instagram in 2 Minutes (Required for DM Automation)
- The 2026 Guide: Using Instagram Auto DMs Without Getting Banned
- Instagram DM Rate Limits 2026: 5,000 DMs/Hour Explained