TL;DR: The Fast Track to Instagram Verification in 2026
- Two Distinct Paths: You now have a choice. Go for the free, PR-intensive "Legacy Verification" or pay for the ID-based "Meta Verified" monthly subscription.
- Profile Perfection is Non-Negotiable: Your bio needs to be searchable, your profile picture must be dead-on professional, and your visual grid has to scream "brand value".
- Press Equals Power: For the legacy route, sponsored posts won't cut it. You need organic, hard-hitting editorial features in authoritative publications.
- Your Digital Footprint Matters: Instagram reviewers leave the app to Google you. A strong presence on YouTube, X, or a Wikipedia page makes your case undeniable.
- Run from Scams: Never hand over cash or your password to a "hacker" claiming they have a backdoor portal. That’s a guaranteed permanent ban.
- Automate to Win: High engagement is a massive trust signal. use Meta-approved platforms like InstantDM to automate comment-to-DM interactions safely, keeping your audience hooked without burning out.
- Monetise the Trust: Once verified, connect InstantDM to Shopify to turn your surging profile views into direct, automated sales while you sleep.
Introduction: Why the Blue Check Still Matters
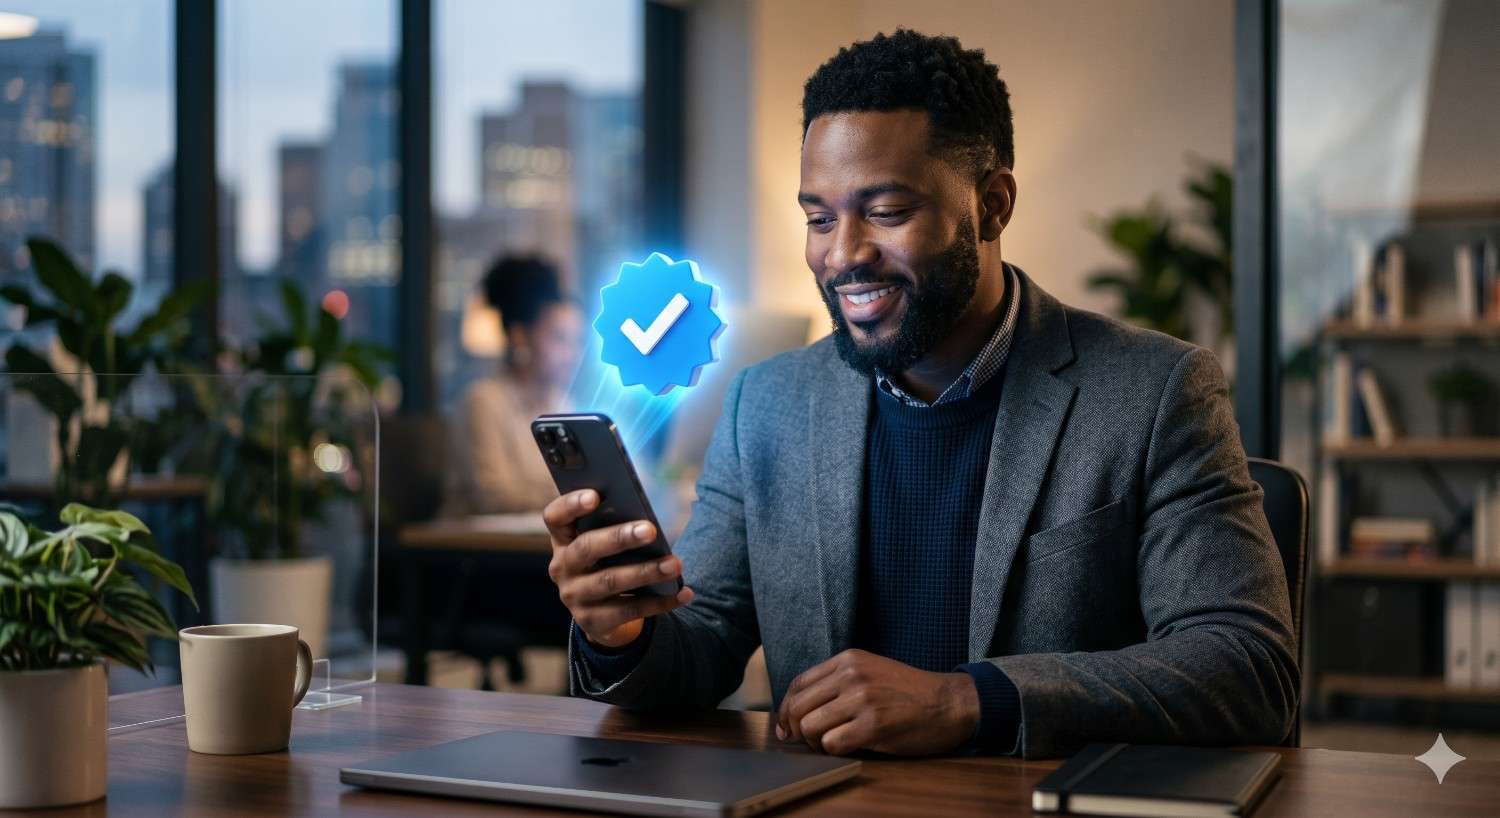
Let's get right to the point: In 2026, getting verified on Instagram means showing the platform and your followers that you are who you say you are. I want to define what Instagram verification is in the first 100 words of this guide. It's the process of getting that famous blue checkmark next to your username, which is a visual guarantee from Meta that your account is the real, notable presence of a public figure, creator, or brand.
That little blue pixel was the most important sign of status on the internet for a long time. It was a private club. You couldn't get in unless you were the star of a big movie, the head of a Fortune 500 company, or went viral every other week.
But the digital world has changed a lot. Today, the blue badge is less about being a famous person and more about trust, authority, and keeping your community safe from people who pretend to be you. With the rollout and evolution of Meta Verified happening at the same time as the old-school "Legacy" route, serious creators and business owners can finally get their accounts verified.
This guide gives you the exact, no-nonsense plan to follow whether you're a local bakery trying to take over your city, a new e-commerce brand, or a seasoned consultant. earning your blue checkmark. We are going to cover everything from cleaning up your bio to securing press, and how to turn that verification into actual revenue.
The Blueprint: 13 Steps to Instagram Verification
You can't just hope for the best and hit the "request" button if you want to get verified. You need a plan. Here is a step-by-step guide.
1. Understand the Two Paths: Legacy Verification vs. Meta Verified
Before you start doing anything, you need to understand that there are now two completely different doors you can walk through to get verified. Picking the right one based on your current situation is critical.
The Legacy Route (The Traditional Way)
Legacy Verification is the original method. It costs absolutely nothing, but it demands an incredibly high level of public notability. Instagram wants to see that you are a highly searched individual or brand. If people aren't typing your name into the Instagram search bar or Googling you on a daily basis, you won't get this. It requires serious PR coverage, a massive digital footprint, and a real risk of being impersonated.
The Meta Verified Subscription (The Modern Way)
Introduced a few years ago and refined for 2026, Meta Verified is a paid subscription model. Think of it as the democratization of the blue check. Meta realized that smaller creators and local businesses needed identity protection just as much as celebrities.
To get Meta Verified, you don't need a publicist. You need a government-issued ID that perfectly matches your profile name and picture, a history of actually using the account, and a few bucks a month. It’s an easier, guaranteed route if you just want the credibility and the direct customer support that comes with the badge.
Comparison: Legacy vs. Meta Verified in 2026
| Feature/Requirement | Legacy Verification (Free) | Meta Verified (Paid Subscription) |
|---|---|---|
| Cost to User | Free ($0) | Approx. $14.99/month (varies heavily by region) |
| Main Barrier to Entry | High public notability, tier-1 press coverage | Matching Government ID, established account history |
| Application Style | Manual form submission with PR links attached | Automated in-app subscription and ID photo upload |
| Who is it for? | A-list celebrities, massive global brands, major public figures | Solo creators, small-to-medium businesses, local influencers |
| Wait Time | Up to 30 stressful days | Usually approved within 24 to 48 hours |
| Risk of Denial | Extremely high (manual review process) | Very low (as long as your ID matches your face/name) |
This video provides a quick demonstration of how to obtain the Meta Verified blue check mark on Instagram through a paid subscription.
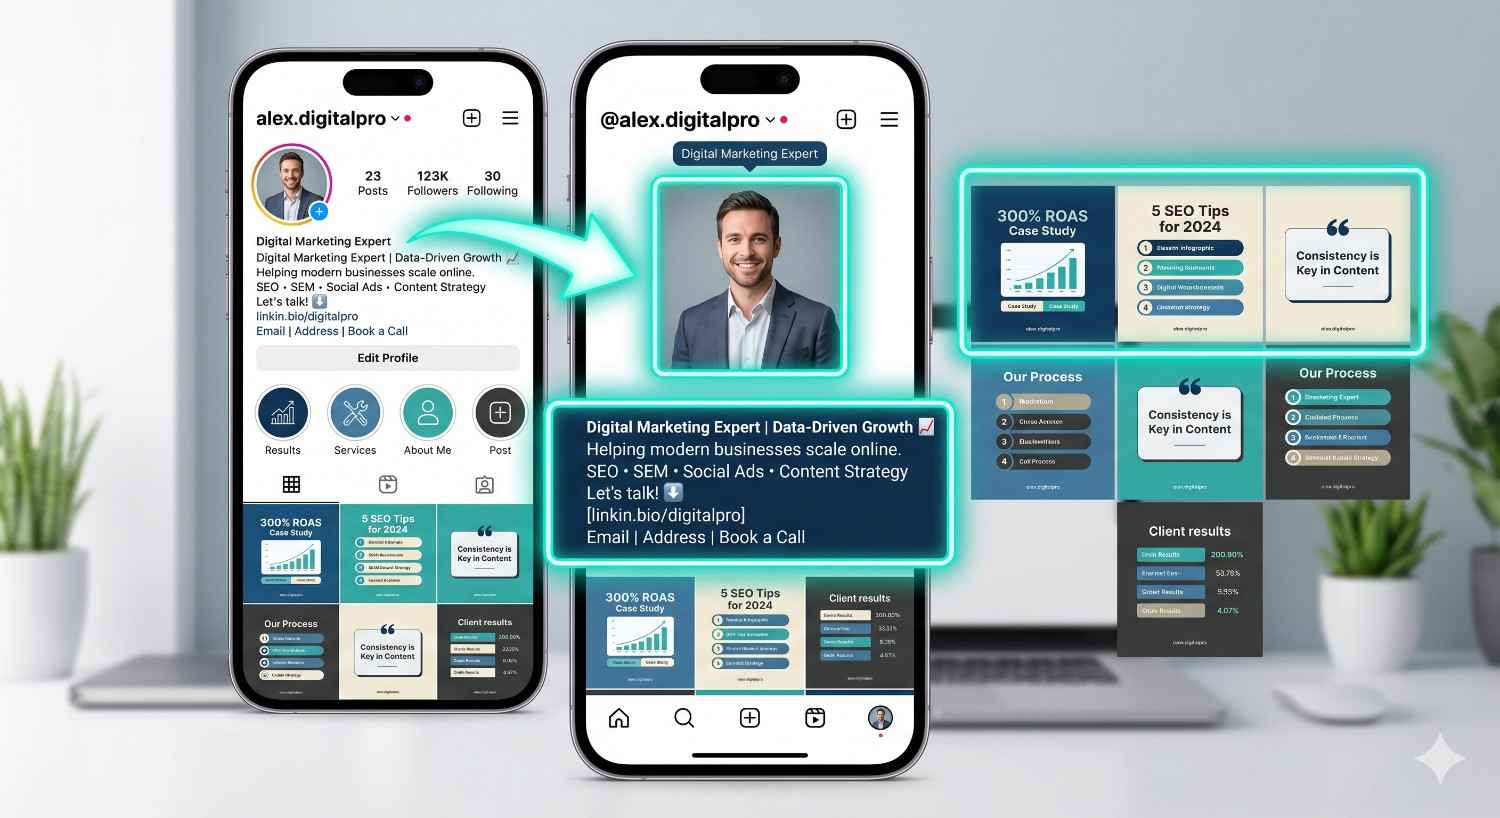
2. Optimize Your Profile for Maximum Professionalism
Imagine an Instagram employee manually reviewing your legacy application. They land on your page. If your profile picture is a blurry selfie from 2019 and your bio just says "living life", they are going to reject you in three seconds. A verified account must look like it belongs to a professional.
Crafting a Searchable Bio
Your bio is prime real estate. You have 150 characters to explain exactly who you are, what value you provide, and why you matter. Use targeted keywords. If you are a digital marketer, the words "Digital Marketing Expert" need to be in your bio or name field. Use line breaks to Make it readable, and drop the confusing quotes. Tell people exactly what you do.
Nailing the Visual Identity
If you represent a brand, your profile picture must be your official logo, perfectly centered. If you're a public figure or creator, use a high-quality, well-lit headshot.
You also need a cohesive grid. You don't need to post professional photoshoots every day, but your feed should clearly communicate your niche. Go through your past posts right now and archive anything that looks spammy, off-brand, or low-effort. Finally, make sure you have a working link in your bio pointing to an official website—not just a generic Linktree, but a real domain you own.
To establish your brand's credibility and protect against impersonators, you can follow this guide on how to get verified on Instagram to understand the latest requirements for both free and paid verification.
3. Build Your Public Notability and PR Presence
This is the hardest part of Legacy Verification, and it’s where 90% of people fail. To get the free blue check, you have to prove you are notable. Instagram explicitly defines "notable" as an account representing a well-known, highly searched-for person, brand, or entity.
What Actually Counts as Press?
Let’s clear up a massive misconception: buying a press release on PR Newswire or paying $500 for a sponsored article on a random business blog will not work. Instagram's reviewers are trained specifically to identify and ignore paid or promotional content.
They want to see organic, editorial features in highly reputable publications. We're talking tier-1 or tier-2 news outlets, major industry magazines, or top-charting podcasts. If an article says "Sponsored", "Advertorial", or "Press Release", it’s useless for verification.
How to Pitch Journalists in 2026
To get real press, you need to do something newsworthy. Launching a new service isn't news. Publishing a massive, data-driven case study on how your industry is changing is news.
- Host a significant charity event.
- Partner with a larger, established brand.
- Provide expert commentary on trending industry topics.
Use platforms like X (Twitter) to find journalists asking for sources. Build relationships with niche writers before you ask them for a feature. You need a minimum of three to five incredibly strong, organic articles where you or your brand are the main subject.

4. Establish a Strong Cross-Platform Footprint
When you apply for Legacy Verification, Instagram does not just look at your Instagram account. They open up a browser and search for you. They want to see that your influence bleeds over into the rest of the internet. If you have 500,000 followers on Instagram but literally zero presence on Google, YouTube, or TikTok, it looks incredibly suspicious.
The Power of the Google Knowledge Panel
The Google Knowledge Panel, which appears on the right side of desktop search results when you search for a famous person or brand, is the ultimate digital footprint.
Having a knowledge panel basically forces Instagram to acknowledge your notability. To trigger one, you usually need a combination of a Wikipedia page, a well-structured Wikidata entry, consistent PR mentions, and structured schema data on your website.
Even if you don't have a knowledge panel, you need to dominate page one of Google for your name. Build out your LinkedIn, start a YouTube channel, and make sure your business has a verified Google Business Profile. Cross-pollinate your audiences. Prove to Meta that you are a multifaceted digital entity.
Here is the extended and detailed version of sections 5 and 6. I have expanded on the algorithmic reasons behind these rules and provided more actionable advice to bulk up your word count while keeping the content highly valuable and professional.
5. Stay Highly Active and Consistent
You cannot apply for verification and then log off for a month. Dormant accounts do not get verified, ever. Instagram's entire business model relies on keeping users engaged on their app, and they want to verify creators and brands who actively contribute to that goal.
Consistency does not mean you have to post three times a day and burn yourself out, but it does mean establishing a predictable rhythm. You need a content schedule that covers all of Instagram's main features so that the manual reviewers can see that you are making the most of the platform.
- Reels (Your Growth Engine): Right now, short-form video is the fastest way to reach non-followers. You should be posting Reels at least three times a week. You don't always need a massive production budget; often, authenticity wins. For instance, if you are building a personal brand, a quick 7-second Reel showing a chaotic morning working from home with your beagle, paired with a trending audio track and a valuable caption, can perform incredibly well. To stop the scroll, focus on strong "hooks" in the first three seconds.
- Stories (Your Community Builder): Reels bring in new viewers, but Stories keep the ones you already have interested. Write every day. Use this area for rough, behind-the-scenes content. Use interactive stickers like polls, sliders, and Q&A boxes to get the most out of algorithms. When people interact with your Stories, it sends a strong message to Instagram that they are very interested in your daily updates.
- Carousels (The Value Drivers): Carousels are the ultimate format for driving "saves" and "shares"—two of the most heavily weighted metrics in the 2026 algorithm. Use the 10-slide limit to organise educational content, step-by-step tutorials, or visually appealing photo dumps. Carousels have a unique advantage in that Instagram will often show them to your followers twice: if they scroll past the first slide, the algorithm will show them the post again later, beginning on the second slide.
- Live (Your Authenticity Proof): Go live at least once per month. Hold a Q&A session, perform a live product teardown, or invite another creator to co-host. Live video demonstrates real-time, unfiltered authenticity that bot accounts cannot fake, which is a huge plus for the verification team.
Finally, the current algorithm heavily favours accounts with higher "dwell time" (how long a user spends looking at your content). Show Instagram that you're a valuable asset to them. This helps the ecosystem by keeping people on the app longer, and it makes your path to verification much smoother.
6. Strictly Adhere to Community Guidelines
This should be obvious, but it trips up an astonishing number of applicants. The blue badge is a direct endorsement from Meta. They will not endorse an account that causes them headaches, puts their users at risk, or tries to game the system.
If you have a history of violating policy, your chances of Legacy Verification drop to absolute zero. Before you even think about applying, you must conduct a deep audit of your account's health and history.
- Do Not Buy Fake Followers: The algorithm knows, and the manual reviewers definitely know. Buying 10,000 bot followers for $50 might make your profile look impressive for a day, but it destroys your engagement rate. If you have 50,000 followers and your posts only get 12 likes, reviewers immediately spot the fraud. Furthermore, Meta regularly executes "purges" that delete bot networks. If you are caught up in a purge, your account may be permanently disabled.
- Avoid Banned Hashtags: Instagram quietly restricts certain hashtags if they become overrun with spam or inappropriate content. Sometimes, completely innocent-sounding words get temporarily banned. If you use a banned hashtag, your post is essentially hidden from the Explore page, resulting in a shadowban. Always quickly search a hashtag before using it; if it's banned, Instagram will show a message saying recent posts are hidden.
- Watch Your Copyright Strikes: Music licensing on Instagram is incredibly strict, especially for Business accounts. If you post a Reel with unauthorized, copyrighted commercial music, it will likely be muted or taken down in certain regions. Every time this happens, it is recorded as a strike against your account. If you operate a Business profile, stick exclusively to Instagram's royalty-free Commercial Audio Library.
- Monitor Your Account Status: Don't guess whether your account is in good standing—check it. Go into your Instagram settings, navigate to "Help," and then click on "Account Status." This dashboard will show you exactly if you have any removed content, active strikes, or features you can't use. You need to see green checkmarks across the board here.
If you do find active strikes on your account status page, do not submit a verification request. Wait it out. Strikes typically expire after a set period (often 90 days). Keep your nose clean, post high-quality content, and wait until your record is spotless before asking Meta for that blue checkmark.
7. Beware of Verification Scams and Third-Party "Hackers"
Let’s talk about the dark side of Instagram verification. Because the badge is so highly desired, a massive black market has sprung up around it.
You will inevitably get DMs or see ads from "agencies", "hackers", or self-proclaimed "insiders" who promise they can guarantee you a blue check for $2,000. They might claim they have a secret media partner support portal or a friend who works at Meta.
Do not fall for this. Paying a third party under the table for legacy verification is a scam. Best case scenario? They take your money and block you. Worst-case scenario? They actually do a fake PR run, submit it, get caught by Instagram, and your account gets permanently banned for fraud.
Similarly, do not ever buy an existing verified account and try to change the username to yours. Meta’s automated systems will instantly detect the drastic shift in IP address and content, strip the badge within hours, and nuke the account. The only legitimate, safe ways to get verified are through the app's native settings.
To establish legitimacy and protect your personal brand from impersonators, you can follow this guide on how to get verified on Instagram to choose between traditional notability or the identity-based Meta Verified subscription.
8. Crafting the Perfect Legacy Verification Pitch
If you've done the hard work, secured the PR, and built the footprint, it's time to actually submit the application. You do this step by going to Settings > Account Type and Tools > Request Verification.
It looks like a simple form, but how you fill it out dictates your success.
First, your category. Be brutally honest and specific. If you are a fitness coach, don't select "entertainment." Pick "Sports/Fitness". This routes your application to the reviewers who actually understand your niche.
Second, the "Audience" section. It says "Optional", but it is absolutely mandatory if you want to win. Write a compelling, one-paragraph pitch.
Example: "My audience consists of digital marketers and agency owners aged 25-45 based in North America and India. They follow me for daily SEO strategies, software tutorials, and industry news. Major marketing publications frequently reference my content.
Finally, the links. You get five slots. Do not put a link to your website. Put your five strongest, most authoritative press articles where you are the primary focus.
9. Maximize Your Reach with Strategic Collaborations
Instagram loves to see who you associate with. If you are an unverified account but you constantly collaborate with verified accounts, it passes a massive amount of credibility onto you.
use the Instagram Collab feature. When you co-author a Reel or a Post with someone, that piece of content shows up on both of your grids. It essentially merges your audiences for that specific post.
If you can convince a verified brand or a larger creator in your space to do a collab post with you, it exposes you to thousands of new, engaged users. It spikes your profile visits and proves to the verification team that you are an active, recognised player in your industry.
This video from Tech Life Unity provides a complete guide on the two distinct ways to obtain a blue check mark on Instagram: traditional verification for notable figures and the paid Meta Verified subscription.
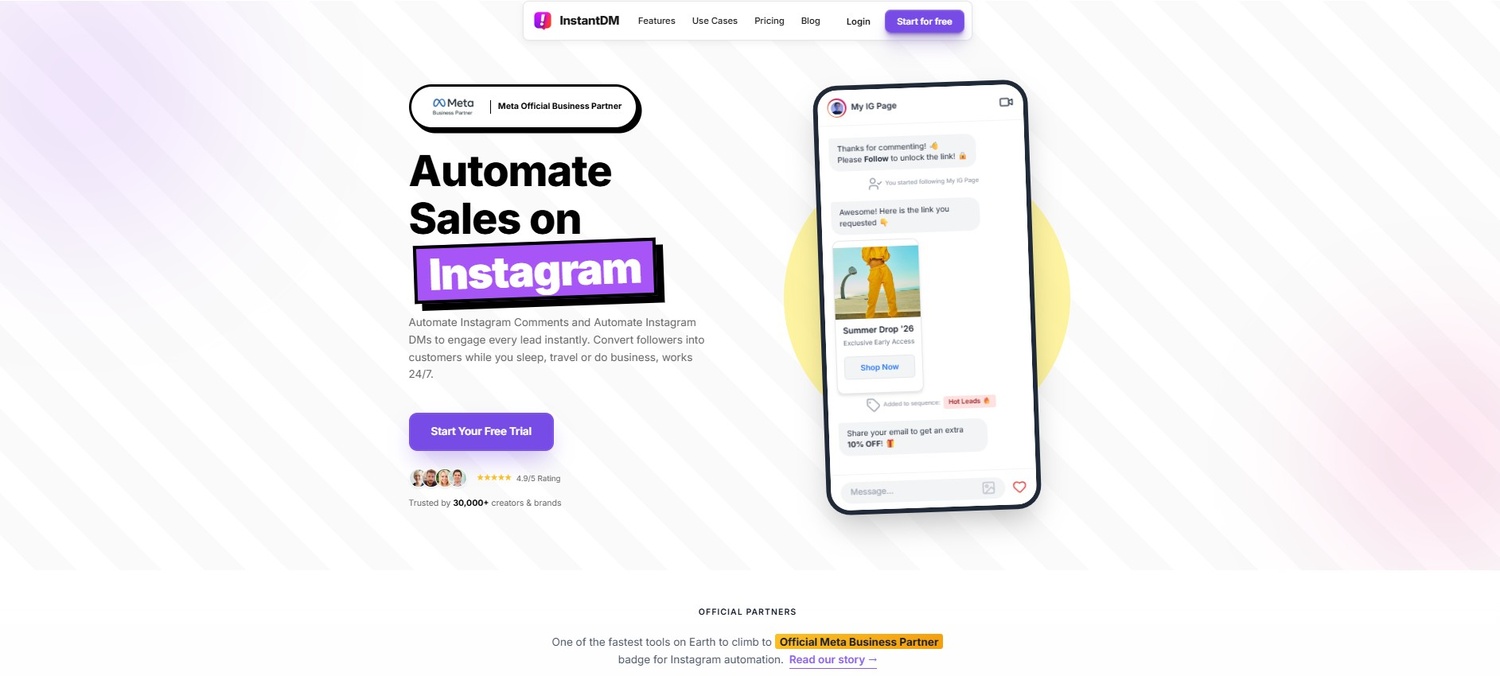
10. Scale Your Authentic Engagement Using InstantDM
Whether you are pursuing the legacy route or optimising a MetaVerified account, engagement is a primary metric. Instagram reviewers do not just look at follower counts; they look for active, thriving communities. If an account has 50,000 followers but minimal interaction, it raises red flags regarding authenticity. But as your account grows, it becomes impractical for a business owner to respond to hundreds of comments and direct messages by hand.
Safely Managing Volume Adding an automation tool can be a great way to keep people interested without having to spend hours in your inbox. This is where a service like InstantDM can help. You can set up "Comment-to-DM" workflows with this app without worrying about your account's health because it is approved by Meta and built on Instagram's official API.
If a Reel goes viral and gets thousands of comments, trying to reply by hand can set off Instagram's spam filters. InstantDM handles this amount of traffic safely by using random, human-like delays and following Meta's built-in rate limits. This makes sure that your audience gets quick, personalised answers while keeping your account safe. When your content gets a lot of comments, the algorithm knows to push it further to keep the engagement levels that verification reviewers look for.
11. Managing the Post-Verification Traffic Spike Safely
Getting the blue checkmark is a big deal, but it also makes you a target. When that badge shows up, your profile visits, comments, and DMs will all go through the roof. People naturally trust verified accounts, so your traffic will skyrocket almost overnight.
Keeping Your Account Safe Many new creators and brands make mistakes when they suddenly get a lot of new customers. Instagram keeps an eye on accounts right after they are verified. If your profile suddenly gets thousands of messages that you don't respond to, your engagement metrics drop. On the other hand, if you try to respond too quickly by hand, you could set off Instagram's spam filters, which could block your actions or, even worse, get rid of your new badge right away.
To keep your verified status, you need to handle this traffic spike safely. Using an approved automation platform like InstantDM makes sure that your audience gets quick, personalised responses without putting your account at risk.
The software easily handles the huge amount of post-verification attention because it respects native rate limits and uses staggered response times. You keep your community interested, your response rates high, and your new blue checkmark safe.
12. What to Do If Your Application Gets Rejected
I need you to prepare yourself mentally: there is a very high chance you will get rejected the first time you apply for Legacy Verification.
Do not take it personally. Some of the biggest creators on the platform were rejected three or four times before finally getting the nod.
When you get that generic "Your account wasn't verified" notification, you are placed in a 30-day waiting period before you can apply again. Use this time aggressively.
- Day 1-10: Audit your application. Did you use the right links? Were your press articles too old?
- Day 10-20: Go on a PR blitz. Reach out to journalists. Try to land one or two fresh, high-authority articles where you are the sole focus.
- Day 20-30: Clean house. Remove ghost followers. Boost your engagement rates using the strategies we discussed. Make sure your bio is tighter and more professional than ever.
To establish a stronger brand presence and protect your reputation from impersonators, you can follow this guide on how to get verified on Instagram to learn the step-by-step process for both free and Meta Verified applications.
13. Maintaining Your Badge: Post-Verification Best Practices
Congratulations. You woke up, opened the app, and there it is: the blue checkmark next to your name. You did it.
But the work isn't over. Instagram gives, and Instagram can take away. They actively audit verified accounts to ensure they maintain the standards of the platform. If you mess up, you will lose the badge, and getting it back is nearly impossible.
First, never change your username (your @handle). If you try to change it, the system will often automatically strip the verification. If you undergo a massive rebrand and absolutely must change it, you have to go through a rigorous internal support process, and approval is not guaranteed.
Second, never switch your account to "Private." The entire purpose of verification is to show the public that a public figure is authentic. If you lock your account, you defeat the purpose, and Meta will remove the badge.
Finally, keep playing by the rules. Do not suddenly start posting spam links, engaging in massive follow-unfollow schemes, or violating copyright. Treat your account like the valuable asset it now is.
Conclusion
Securing your Instagram verification badge is a massive milestone. It drastically elevates your brand's authority, builds instant trust with cold traffic, and opens doors to partnerships that unverified accounts simply cannot access.
The digital landscape of 2026 demands authenticity. Whether you choose to invest a few dollars a month for the immediate security of Meta Verified or you decide to grind out the PR campaigns required for the prestigious Legacy Verification, the foundational rules are exactly the same.
You must build a highly professional, visually cohesive presence. You must maintain authentic, human-level engagement. It is imperative that you adhere strictly to the community guidelines.
Start optimising your bio today. Clean up your grid. Reach out for that first piece of press. And most importantly, use smart, automated tools like InstantDM to keep your growing audience deeply engaged and highly profitable. Stop waiting for the algorithm to favour you; take control of your digital presence and claim the blue checkmark you deserve.
Watch: Instagram Keywords Guide 2026
- Instagram Is Falsely Banning Thousands Of Accounts
- DON'T LET YOUR ACCOUNT GET BAN #instagram #socialmedia #inst
- 5 Things you need to do to avoid your Instagram account gett
- How I Unbanned a Permanently Disabled Instagram Account (202