TL;DR
Posting to Instagram from your PC or Mac is no longer a clunky workaround; it is a fully native, seamless experience that professionals rely on. If you want to know how to post on Instagram using a computer, the short answer is: go to Instagram.com, log in, click the "+" create icon, upload your file, and hit share. Using a desktop saves you countless hours, preserves the high-resolution quality of your edited files, and lets you type out long-form captions on a proper keyboard without fighting autocorrect. By utilizing tools like Meta Business Suite and integrating smart automation workflows, you can turn your computer into a 24/7 content and lead generation command center.
Introduction
Let’s get straight to the point: if you are wondering how to post on Instagram using a computer or PC the easy way, you simply need to open your web browser, navigate to Instagram.com, click the “Create” plus icon on the sidebar, select your media, write your caption, and publish. That is the fundamental process.
But if you are managing a brand, running a digital marketing agency, or trying to scale a business in 2026, you already know that just "hitting publish" isn't enough. For years, Instagram functioned strictly as a mobile-first platform. Creators and social media managers were forced into maddening workarounds—emailing photos to themselves, using third-party apps that barely worked, or saving files to cloud drives just to download them on an iPhone. It was a massive drain on productivity.
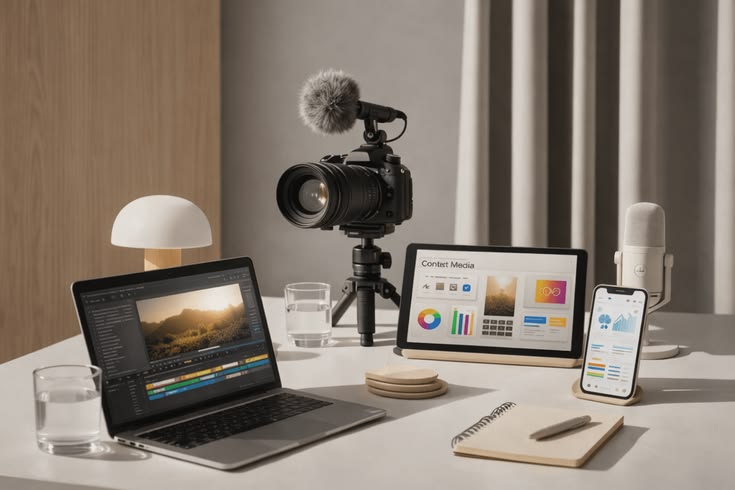
Thankfully, those days are entirely behind us. The desktop version of Instagram has evolved from a limited viewing gallery into a powerhouse creator studio. Whether you are building the visual identity for an educational platform like Digital Marketing Academy or running daily client campaigns, using your computer gives you the screen real estate, folder organization, and keyboard precision required for serious work. In this massive, comprehensive guide, we are going completely under the hood. We will break down every single method for posting from your desktop, how to maintain the highest possible media quality, and how to structure your daily operations so your profile actually works for you.
1. The Hidden Productivity Benefits of Managing Instagram from a PC
For a long time, there was a weird stigma that if you weren't posting from your phone, you weren't doing social media "right." That mindset is dead. When you shift your primary Instagram workflow from your mobile device to your desktop, the psychological and practical benefits are immediate and undeniable.
Let’s talk about the file-transfer bottleneck. Imagine you just finished designing a stunning, slide-by-slide carousel in Illustrator or Canva. The colors are perfectly calibrated—maybe you swapped out silver accents for a sharp, attractive gold. On a mobile workflow, you have to export those files, upload them to Google Drive or Dropbox, open the app on your phone, wait for them to download, save them to your camera roll, and then finally open Instagram. It is an exhausting, multi-step process that invites quality compression at every turn.
When you work on a PC, you bypass all of that. You export your graphic to a desktop folder and drag it directly into your web browser. Boom. Done.
Beyond file management, there is the issue of context-switching. Mobile phones are inherently designed for consumption, not production. Every time you pick up your phone to post a business update, you are bombarded with WhatsApp messages, personal notifications, and the gravitational pull of the explore page. By keeping your workflow on a reliable machine—whether that’s a custom rig or a solid Dell or HP laptop running a fast Intel i5 processor—you create a physical and mental boundary. The PC is for producing. The phone is for browsing. This separation alone will easily save you hours every single week.
While many associate the platform with mobile use, you can post high-quality photos and videos to Instagram directly from your PC by using the official website's creation tools.
2. The Native Web Method: Posting Photos and Carousels via Instagram.com
If you want the most frictionless, straightforward way to get a post live from your computer right now, the native web interface is your best friend. You don't need any complex software or paid third-party tools to Make this happen. Here is the exact, step-by-step breakdown of how to execute this flawlessly.
Accessing the Creator Window
First, open up your preferred web browser—Chrome, Safari, Firefox, or Edge all work perfectly. Navigate to Instagram.com and log into your account. Look over to the left-hand side of your screen. You will see the main navigation sidebar containing Home, Search, Explore, Messages, and Notifications. You are looking for the square icon with the "+" sign inside it, clearly labeled "Create." Click it.
The Upload and Framing Process
A new window will pop up right in the center of your screen, prompting you to "Drag photos and videos here." You can either grab a file directly from your desktop and drop it into this box, or click the blue "Select from computer" button to open your file explorer.
If you are putting together a carousel (which you absolutely should be doing for higher engagement), select your first image, and then click the small overlapping squares icon in the bottom right corner of the preview to add more slides.
Now, pay close attention to the crop. By default, Instagram might try to force your image into a 1:1 square. If you designed a sleek 4:5 vertical portrait, you need to click the crop icon (the two overlapping right angles in the bottom left) and select "Original" or "4:5" to ensure your image isn't awkwardly chopped off. You can click and drag your image with your mouse to frame it perfectly.
Desktop Color Grading and Adjustments
Once your framing is locked in, hit "Next" in the top right corner. This brings you to the editing suite. The desktop version offers the exact same lineup of native filters as the mobile app (Clarendon, Gingham, Moon, etc.).
If you prefer manual control, click over to the "Adjustments" tab. Here, using your mouse, you can slide toggles to tweak brightness, contrast, saturation, temperature, fade, and vignette. Because you are looking at a much larger, brighter monitor, your color grading here will likely be much more accurate than if you were squinting at a phone screen outdoors.
Finalizing and Publishing
Hit "Next" one last time. You have arrived at the publishing screen. Here is where you will type out your caption, add your location tags, and tag other accounts by clicking directly on the image preview. You also have an "Accessibility" dropdown where you should absolutely be writing alternative text (alt-text) for SEO purposes. Once everything looks perfect, click "Share," and your post will be live on the feed.
3. How to Upload and Optimize Instagram Reels Directly from Your Desktop
If you are ignoring Reels in 2026, you are actively leaving reach on the table. They are the primary engine for organic growth. Fortunately, the days of Airdropping heavy video files to your phone just to upload a Reel are over. The desktop platform handles video beautifully, provided you understand the specifications.
Nailing Your Video Specifications Before Uploading
Instagram’s compression algorithm is notoriously aggressive. If you feed it a massive, unoptimized file, it will crunch it down and ruin your quality. Before you even open Instagram on your browser, ensure your video file is prepped correctly.
If you are cutting video in Premiere Pro, Final Cut, or CapCut for desktop, export your final project as an MP4 file. The orientation must be vertical, meaning a 9:16 aspect ratio. In pixel terms, that is 1080 pixels wide by 1920 pixels high. Keep your frame rate at 30fps or 60fps, and try to keep the overall file size under a gigabyte for the smoothest browser upload experience.
The Desktop Reels Upload Workflow
The process starts exactly like a photo upload. Click the "Create" button on the web interface and select your MP4 file. The system is smart enough to recognize the dimensions and will automatically classify the upload as a Reel.
Selecting the Perfect Cover Image
One of the most annoying parts of uploading Reels on mobile is trying to select a specific frame for the cover image with your thumb. On desktop, it is incredibly precise. You can use your mouse to scrub through the timeline frame-by-frame until you find the exact moment you want. Alternatively, and this is highly recommended for a cohesive grid, you can upload a custom-designed static image directly from your computer to serve as the cover.
You can also trim the start and end times of your video directly in the browser if you realize you left a second of dead air at the end of your clip. Once your cover is set and the video is trimmed, write your caption, add your hashtags, and publish.
To share content without your phone, simply log in to the Instagram website on your browser and use the "Create" button on the left sidebar to start a new post.

4. Navigating Meta Business Suite
If you are running a professional Creator or Business account, you need to look beyond the standard Instagram.com interface. Meta Business Suite is the official, free command center provided by Meta, and it is a non-negotiable tool if you want to take desktop publishing seriously.
The Setup and Account Linking
To gain access to Meta Business Suite, your Instagram account must be linked to a Facebook Business Page. You can't bypass this. Head over to business.facebook.com and log in with the Facebook account that holds admin rights to that page. Once you are in, you will be greeted by a unified dashboard that tracks both your Facebook and Instagram presences simultaneously.
The Drafting and Scheduling Powerhouse
The real reason we use Business Suite is for its scheduling capabilities. Click the "Create Post" or "Create Reel" button on the home dashboard. This interface is much more robust than the standard web app.
You can upload your media and write your caption, but the magic lies in the preview section. You can toggle between desktop and mobile views to see exactly how your post will look on the feed before it goes live.
Instead of hitting publish immediately, you can use the scheduling tool. A calendar drops down, allowing you to pick specific dates and down-to-the-minute times for your content to go live. You can sit down on a Sunday morning with a cup of coffee and schedule out an entire month’s worth of backlinks, promotions, and engaging content without ever touching your phone.
5. Maximizing Screen Real Estate
We need to talk about the physical advantage of sitting at a desk. When you are trying to execute a high-level visual strategy, a six-inch screen is a massive liability. You cannot properly judge visual balance, typography hierarchy, or subtle color tones on a smartphone screen that has a cracked screen protector and fingerprint smudges all over it.
Using a 24-inch or 27-inch monitor gives you an unbelievable advantage. You can literally split your screen down the middle. On the left side, you have your brand guidelines, your content calendar, or your client notes open. On the right side, you have your Instagram upload window.
This allows you to cross-reference everything in real-time. Are the fonts in your graphic legible? Does the aesthetic match the rest of your grid? When you have multiple windows open, you can visually inspect your graphics for pixelation and ensure everything aligns with your broader digital marketing strategy before the world sees it.

6. Writing Engaging Captions Faster
Copywriting is an art form. It requires thought, revision, and careful structuring. Trying to type a compelling, 400-word micro-blog caption with your thumbs is not only incredibly slow, but it almost guarantees typos. Autocorrect will inevitably change a crucial industry term into something embarrassing, and you won't notice until the post has been live for three hours.
The Tactile Keyboard Advantage
By managing your Instagram from a PC, you unlock the speed and accuracy of a full physical keyboard. You can type at the speed of thought. You can draft your captions in a dedicated word processor like Google Docs, Notion, or Microsoft Word. This allows you to run your text through advanced grammar and spell checkers like Grammarly before it ever touches the platform.
Solving the Line Break Nightmare
If you have ever posted from the mobile app, you know the frustration of formatting. You hit "return," but when the post goes live, Instagram crushes all your paragraphs together into one massive, unreadable wall of text. People used to use invisible characters or annoying periods (.) just to force a line break.
When you post from a PC browser, this problem vanishes. Hitting the "Enter" or "Return" key creates a clean, permanent line break. Your formatting is preserved exactly as you typed it. Furthermore, accessing emojis is incredibly fast on a desktop. If you are on Windows, simply press the Windows key + the period key (.) to bring up the emoji menu. On a Mac, press Control + Command + Space.
7. Managing Multiple Instagram Accounts on a Desktop
If you are a freelancer, an agency owner, or just someone with a personal brand and a separate business hustle, you are intimately familiar with the headache of juggling multiple accounts. Logging in and out constantly is a security risk and a massive waste of time.
While the mobile app allows you to stay logged into multiple accounts and double-tap your profile picture to switch, the desktop experience has historically been a bit clunky in this regard. However, things have improved dramatically.
On the native Instagram.com site, you can now easily switch accounts. If you click on your profile picture in the bottom left corner, you will see a "Switch accounts" option. You can save the login info for multiple profiles and bounce between them with a single click.
But again, Meta Business Suite is the superior option here. If you manage multiple clients, you can organize all of their linked Facebook pages and Instagram accounts in a single dropdown menu at the top left of the Business Suite dashboard. You can check notifications for Client A, schedule a post for Client B, and reply to messages for Client C, all from the same centralized hub without ever having to manage passwords.
To maintain a professional feed and high-quality captions, brands should use the ability to post on Instagram from a PC, allowing for easier proofreading and visual previews on a larger screen.

8. Advanced PC Tricks: Using Browser Developer Tools
Sometimes, you might find yourself in a situation where the desktop version of Instagram is just acting weird, or you want to see exactly how a profile looks on a specific mobile device without picking up your phone. You can actually trick your desktop browser into thinking it is a smartphone.
This is a classic developer trick that every social media manager should know. It is called the "Inspect Element" hack.
The Step-by-Step Inspect Element Hack
- Open up Instagram.com on Google Chrome (this works best on Chrome or Edge).
- Right-click anywhere on the blank space of the web page and select "Inspect" from the dropdown menu (or simply press F12 on your keyboard).
- A panel of complex HTML code will slide out on the right side of your screen. Don't panic; you don't need to know how to code. Look at the very top toolbar of this new code panel. You will see an icon that looks like a tiny mobile phone sitting in front of a tablet. This is the "Toggle Device Toolbar" (you can also hit Ctrl+Shift+M).
- Click that icon. Instantly, your main browser window will shrink down to mobile dimensions. At the top of the screen, you will see a dropdown menu that says "Responsive." Click it, and you can select specific devices, like an iPhone 14 Pro or a Samsung Galaxy.
- Hit refresh (F5). Your browser is now running the exact mobile interface of Instagram right on your desktop monitor. This is incredibly useful for testing UI layouts or accessing features that might be temporarily glitching on the desktop build.
9. Desktop Community Management
We spend a lot of time talking about outbound content—posting, scheduling, publishing. But any seasoned marketer will tell you that posting is only 20% of the job. The other 80% is community management. It is replying to comments, nurturing leads, and building relationships.
If you post a highly engaging piece of content and suddenly get hit with 150 comments, trying to manage that influx on a mobile phone is a nightmare. Your thumbs cramp up, you lose track of who you replied to, and it takes hours.
Your PC is the ultimate command center for community management. You can click into a post and view the entire comment thread on a massive screen. You can use your keyboard to fire off thoughtful, personalized replies in seconds. You can easily open multiple tabs to verify information or grab specific URLs to paste into replies.
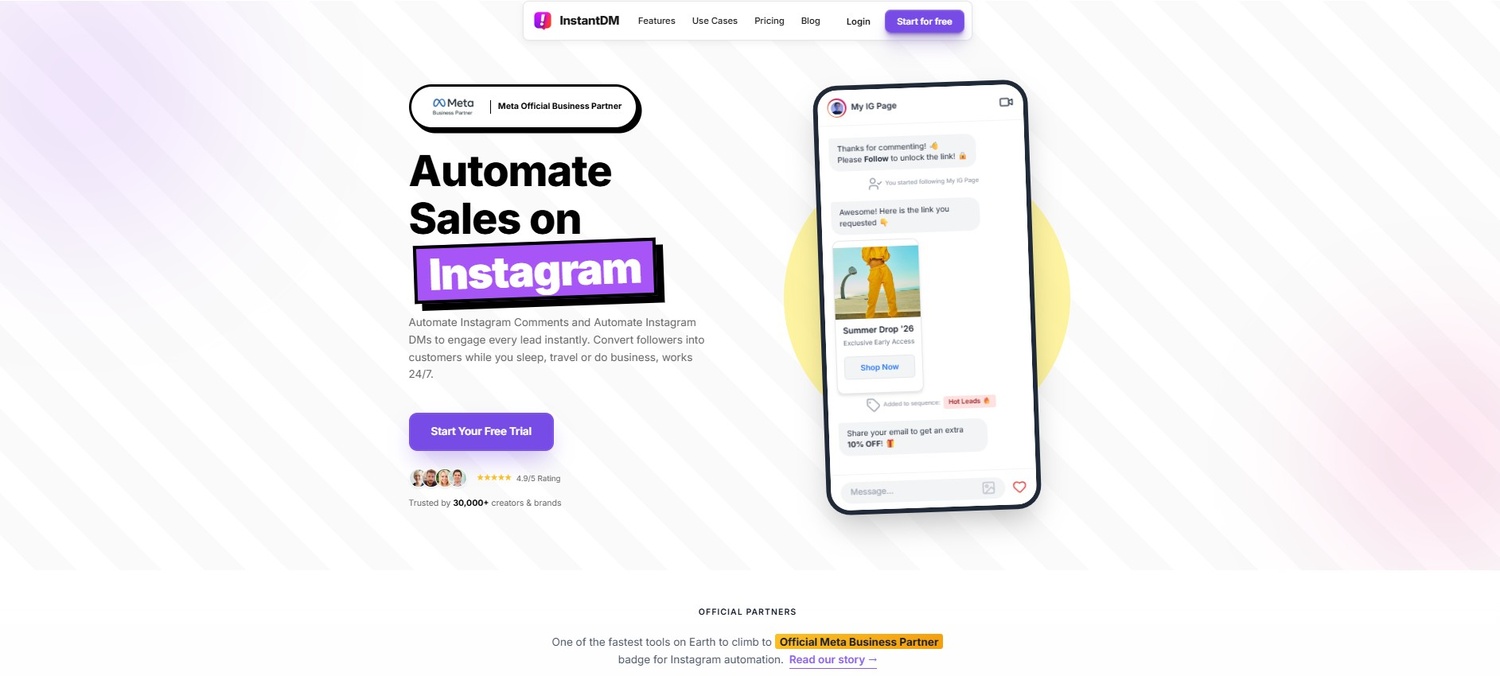
However, even with a keyboard, manual replies don't scale. This is where forward-thinking agencies start integrating software. Many top-tier managers use tools like InstantDM in the background. While they monitor the broad sentiment of the comments on their desktop screen, they let the software handle the repetitive task of sending follow-up links to users' inboxes automatically. It keeps the desktop workflow clean and focused on high-level strategy rather than mindless data entry.
To share high-quality video content from your workstation, simply log in to the Instagram website and use the "Create" button to upload and crop your Reels directly from your PC.

10. Troubleshooting Common Desktop Upload Errors
The desktop experience is vastly superior to mobile, but it is not completely immune to technical hiccups. Because you are dealing with web browsers, cache issues, and varying file types, you might occasionally run into a wall. Here is a deep dive into the most common desktop upload errors and exactly how to fix them so you don't lose your mind.
"Your video couldn't be uploaded"
This is the most common error you will see when trying to push a Reel from a PC. 99% of the time, this comes down to two things: format or file size. Instagram web is very strict. If you are trying to upload an Apple .MOV file, it might throw a fit. Always export as a standard .MP4. Secondly, check your file size. If you exported a 4K video at a massive bitrate and the file is 1.5GB, the browser will likely time out before it finishes uploading. Compress your video to 1080p and keep it under 250MB for web uploads.
The Dreaded Aspect Ratio Crop
You spent hours making a beautiful vertical infographic, but when you upload it on your PC, Instagram chops off the top and bottom, forcing it into a square. This happens because you missed the crop button. When you drag your image into the browser, you MUST click the two overlapping right-angle icons in the bottom left corner of the preview and select "Original" or "4:5". Do not just hit next, or your hard work will be ruined.
Browser Glitches and the Infinite Loading Circle
Sometimes you click "Share," and the little loading circle just spins forever. The post never goes live. This is almost always a browser issue. First, check if you have any aggressive ad-blockers or tracking-blockers running (like uBlock Origin or Brave's shields). Sometimes these extensions mistakenly block Instagram's upload scripts. Disable them for Instagram.com. If that doesn't work, you likely have a corrupted cache. Open an "Incognito" or "Private" browsing window, log into Instagram, and try uploading there. If it works, you know you need to clear your main browser's cache and cookies.
11. Scheduling Content and Uploading Instagram Stories from Your PC
One of the biggest limitations of the native Instagram web browser is the inability to post Stories. Since Stories disappear after 24 hours, they require constant updating. If you are designing high-quality Story graphics on your desktop for a brand, sending them to your phone every few hours is incredibly inefficient.
To bypass this, you need to use Meta Business Suite. This is the only official desktop method to seamlessly upload and schedule your Instagram Stories.
How to Post Stories via Meta Business Suite:
- Open your Meta Business Suite dashboard and click "Create Story."
- Select the Instagram account you want to post to.
- Upload your vertical media (1080x1920 pixels). You can upload up to 10 photos or videos at once from your PC.
- Use the desktop creative tools to crop the media, add text, or apply custom stickers.
- Click "Share" to post immediately, or click the arrow next to "Share" to schedule the Story for a later date and time.
By batch-scheduling your feed posts and Stories on a desktop, you free up massive amounts of time. To make this workflow even more efficient, many professional social media managers pair their Meta Business Suite schedule with lightweight background tools like InstantDM. This allows you to schedule your post via Meta, and simultaneously have an automation running that instantly replies to any user who engages with that new content, allowing you to completely step away from your computer.
12. Mac Users: The Safari Responsive Design Hack and Community Management
The "Inspect Element" trick we covered earlier is fantastic for Chrome and Edge users, but what if you work exclusively on a Mac using Safari? Apple has its own built-in developer workaround that allows you to force Safari to display the mobile version of Instagram, giving you access to mobile-only features right on your Mac monitor.
The Safari Mobile Hack:
- Open Safari and click on "Safari" in the top-left menu bar, then select "Settings" (or Preferences).
- Click the "Advanced" tab and check the box at the very bottom that says "Show features for web developers" (or "Show Develop menu in menu bar").
- Navigate to Instagram.com and log in.
- Click the newly added "Develop" tab in your top menu bar and select "Enter Responsive Design Mode."
- Your screen will now show various Apple devices. Click on an iPhone model.
- Refresh the page. You now have the full mobile interface on your Mac.
Once your content is live—whether uploaded via the native web, Meta Business Suite, or a browser hack—your desktop becomes your community management hub. Replying to a sudden influx of comments is significantly faster on a tactile Mac or PC keyboard. However, if your content goes viral and manual replies become impossible, this is where leaning on a flat-rate automation solution like InstantDM becomes crucial. Instead of frantically typing out 500 identical replies on your computer, you can let the software instantly deliver your links and resources to the comment section while you focus on analyzing your desktop metrics.
You can easily share content to Instagram directly through your web browser by using the native upload feature, which now supports carousels and basic image adjustments.
13. Third-Party Desktop Schedulers vs. Native Tools
As you refine your PC workflow, you will face a choice regarding the software environment you use to manage your content. Should you stick strictly to what Meta provides, or should you look outward to third-party dashboards? Let’s break down the realities of both approaches so you can make an informed decision for your brand.
| Feature Comparison | Instagram.com (Native Web) | Meta Business Suite | Advanced Third-Party Tools (e.g., InstantDM) |
|---|---|---|---|
| Best Used For | Quick, manual, single-post uploads on the fly. | Free, reliable batch scheduling and basic page analytics. | Creating complex sales funnels and automating engagement. |
| Can you Schedule in Advance? | No. Posts go live immediately. | Yes. You can schedule up to a month out. | Yes. Often integrates post scheduling with triggered actions. |
| Automated Comment Replies? | No. Everything must be typed manually. | No. Only basic away messages for DMs are available. | Yes. Instant, keyword-based replies and dynamic DM flows. |
| Lead Data Collection? | No. | No. | Yes. Can collect emails and phone numbers directly in chat. |
| Risk of Account Bans? | Zero. It is the native platform. | Zero. Official Meta tool. | Low to Zero, if the tool is an official Meta Business Partner. |
The key takeaway from this table is progression. You start with the native web app to understand the mechanics. You move to Meta Business Suite to get your time back through scheduling. Finally, you graduate to specialized third-party tools when you have too much engagement to handle manually and need to convert those comments into actual revenue.
14. Final Checklist: Optimizing Your PC-to-Instagram Workflow
We have covered a massive amount of ground. Before you finalize your new desktop routine, you need a pre-flight checklist. Missing a small detail on a PC upload can ruin a post just as easily as on a phone. Print this out or keep it on a sticky note next to your monitor.
- The Color Space Check: Did you export your graphics in the sRGB color space? If you export in CMYK (which is for print), Instagram will completely wash out your colors when you upload from your browser.
- The Video Spec Check: Is your Reel exactly 1080x1920? Is it an MP4? Is the file size reasonable? Check file properties on your PC before dragging it into the browser.
- The Aspect Ratio Lock: Did you click the crop tool and select "Original" or the correct vertical ratio? Never let Instagram auto-crop your hard work into a square without your permission.
- The Typo Hunt: You are on a full keyboard now. You have no excuse for bad spelling. Did you run the caption through a quick spell check? Did you use the "Enter" key to create clean, readable paragraphs?
- The Link and Trigger Verification: If you are running a promotional strategy, did you double-check that the link in your bio is actually working? If you have an automation trigger set up via a tool like InstantDM, did you test the keyword on a dummy account to ensure the flow fires correctly?
- The First 30 Minutes: Even when scheduling from a PC, try to be near your desk for the first 30 minutes after a post goes live. The algorithm judges initial velocity heavily. Be ready to reply to those first few early comments manually to spark the conversation.
Conclusion
Transitioning your Instagram operations from the palm of your hand to a dedicated computer setup is one of the most impactful, high-use decisions you can make for your digital strategy. It completely removes the friction of endless file transfers, saves you from the physical exhaustion of typing long captions on a glass screen, and provides the professional, wide-angle oversight required to produce top-tier visual content.
By mastering the native web interface and leaning into the organizational power of Meta Business Suite, you take back control of your schedule. You dictate when content gets created and when it goes live, rather than being a slave to your phone's notification ping.
But remember, uploading is only half the equation in 2026. The real magic happens when you combine this efficient desktop publishing routine with intelligent, backend systems. By layering in tools like InstantDM to handle the influx of engagement, you ensure that every single post you painstakingly upload from your PC actually works for you—capturing leads, delivering links, and closing sales around the clock. Your computer becomes more than just an upload terminal; it becomes the control center for a highly automated, deeply profitable social media machine. Start using your desktop today, clean up your workflow, and watch your brand grow.

.jpg)